Overview
We have created a suite of packages that, together, mock an account servicing entity that has deployed Rafiki, exposing an SPSP endpoint, the Open Payments APIs with its required GNAP auth endpoints to request grants, a STREAM endpoint for receiving Interledger packets, and a UI to view and manage the Rafiki instance.
These packages include:
backend(SPSP, Open Payments APIs, GraphQL Admin APIs, STREAM endpoint)auth(GNAP auth server)mock-account-servicing-entity(mocks an Account Servicing Entity)frontend(Remix app to expose a UI for Rafiki Admin management via interaction with thebackendAdmin APIs)
These packages depend on the following databases:
- TigerBeetle or Postgres (accounting)
- Postgres (Open Payments resources, auth resources)
- Redis (STREAM details, auth sessions)
We provide containerized versions of our packages together with two pre-configured docker-compose files (Cloud Nine Wallet and Happy Life Bank) to start two Mock Account Servicing Entities with their respective Rafiki backend and auth servers. They automatically peer and 2 to 3 user accounts are created on both of them.
This environment will set up a playground where you can use the Rafiki Admin APIs and the Open Payments APIs.
Environment overview
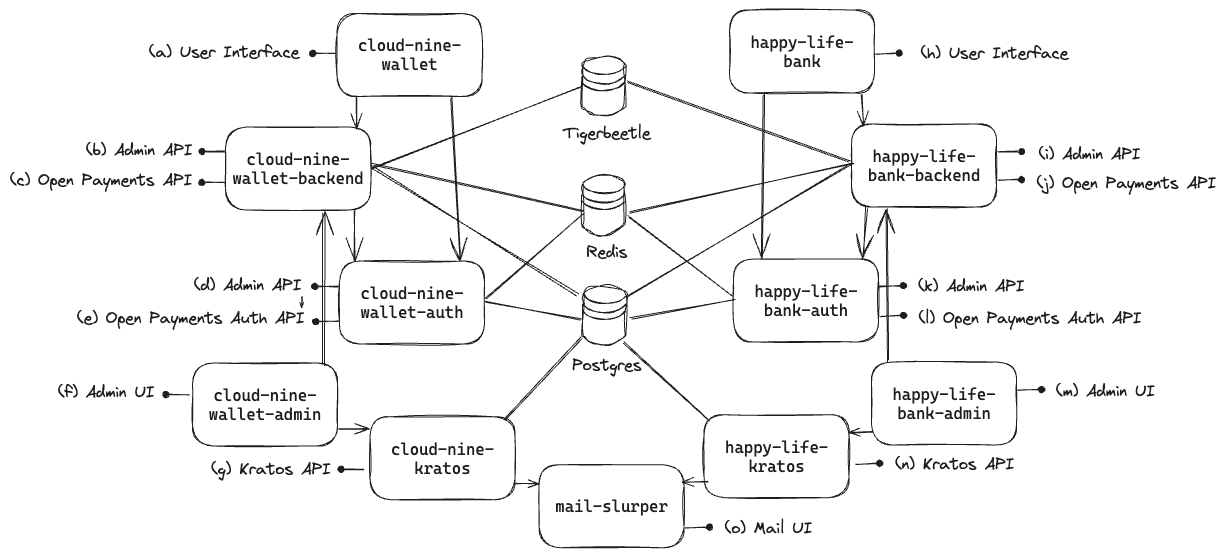
Cloud Nine Wallet
(a) User Interface - accessible at http://localhost:3030
(b) Admin API - accessible at http://localhost:3001/graphql
(c) Open Payments API - accessible at http://localhost:3000
(d) Auth Admin API - accessible at http://localhost:3003/graphql
(e) Open Payments Auth API - accessible at http://localhost:3006
(f) Admin UI - accessible at http://localhost:3010
(g) Kratos API - accessible at http://localhost:4433
Happy Life Bank
(h) User Interface - accessible at http://localhost:3031
(i) Admin API - accessible at http://localhost:4001/graphql
(j) Open Payments API - accessible at http://localhost:4000
(k) Auth Admin API - accessible at http://localhost:4003/graphql
(l) Open Payments Auth API - accessible at http://localhost:4006
(m) Admin UI - accessible at http://localhost:4010
(n) Kratos API - accessible at http://localhost:4432
Mail Slurper
(o) Mail UI - accessible at http://localhost:4436
Database
Postgres Server - accessible at http://localhost:5432
Exploring Accounts on Mock Account Servicing Entity
Navigate to localhost:3030 to view the accounts on one instance of the Mock Account Servicing Entity called Cloud Nine Wallet.
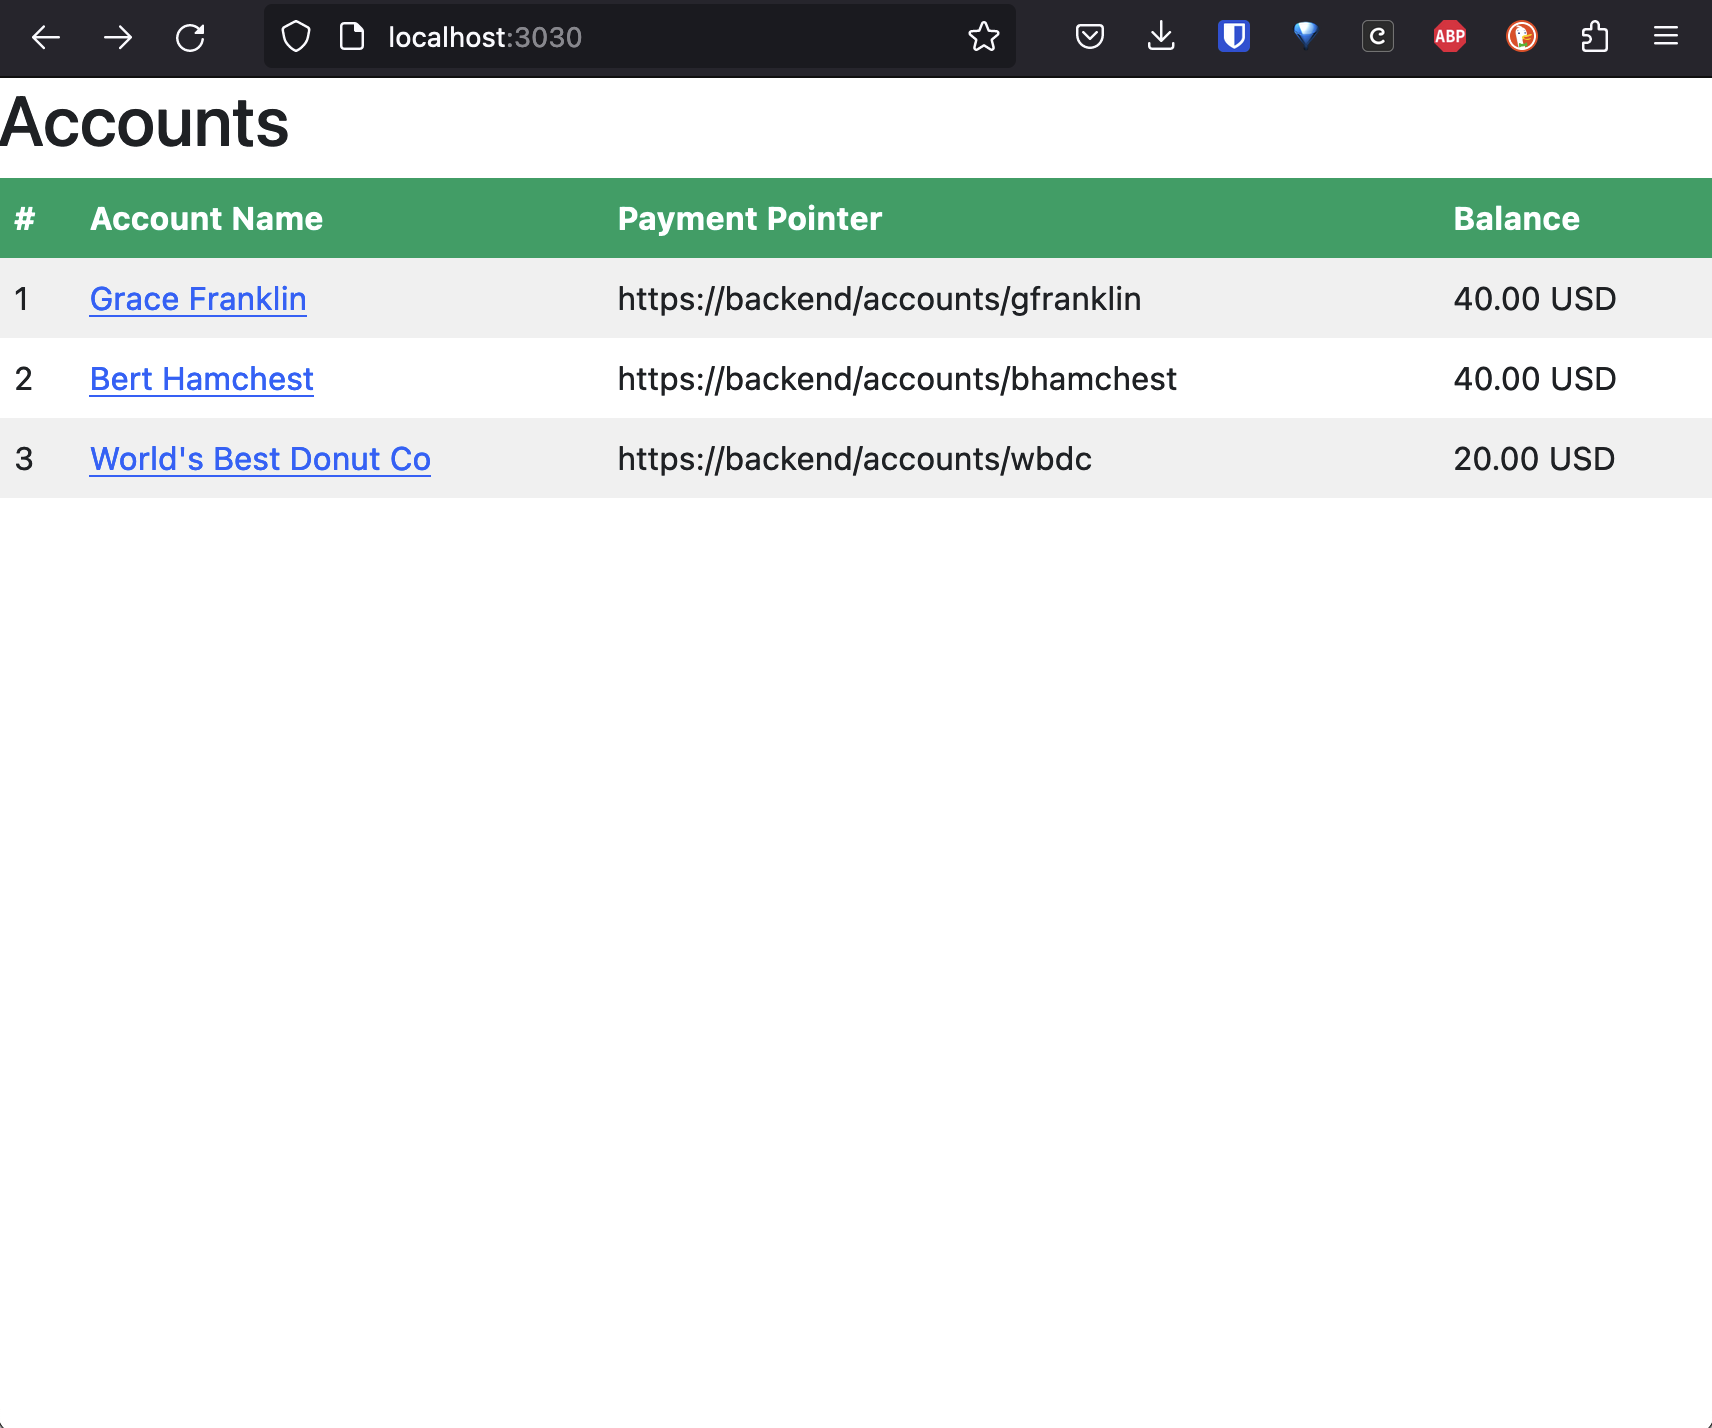
The accounts of the second instance (Happy Life Bank) can be found on localhost:3031.
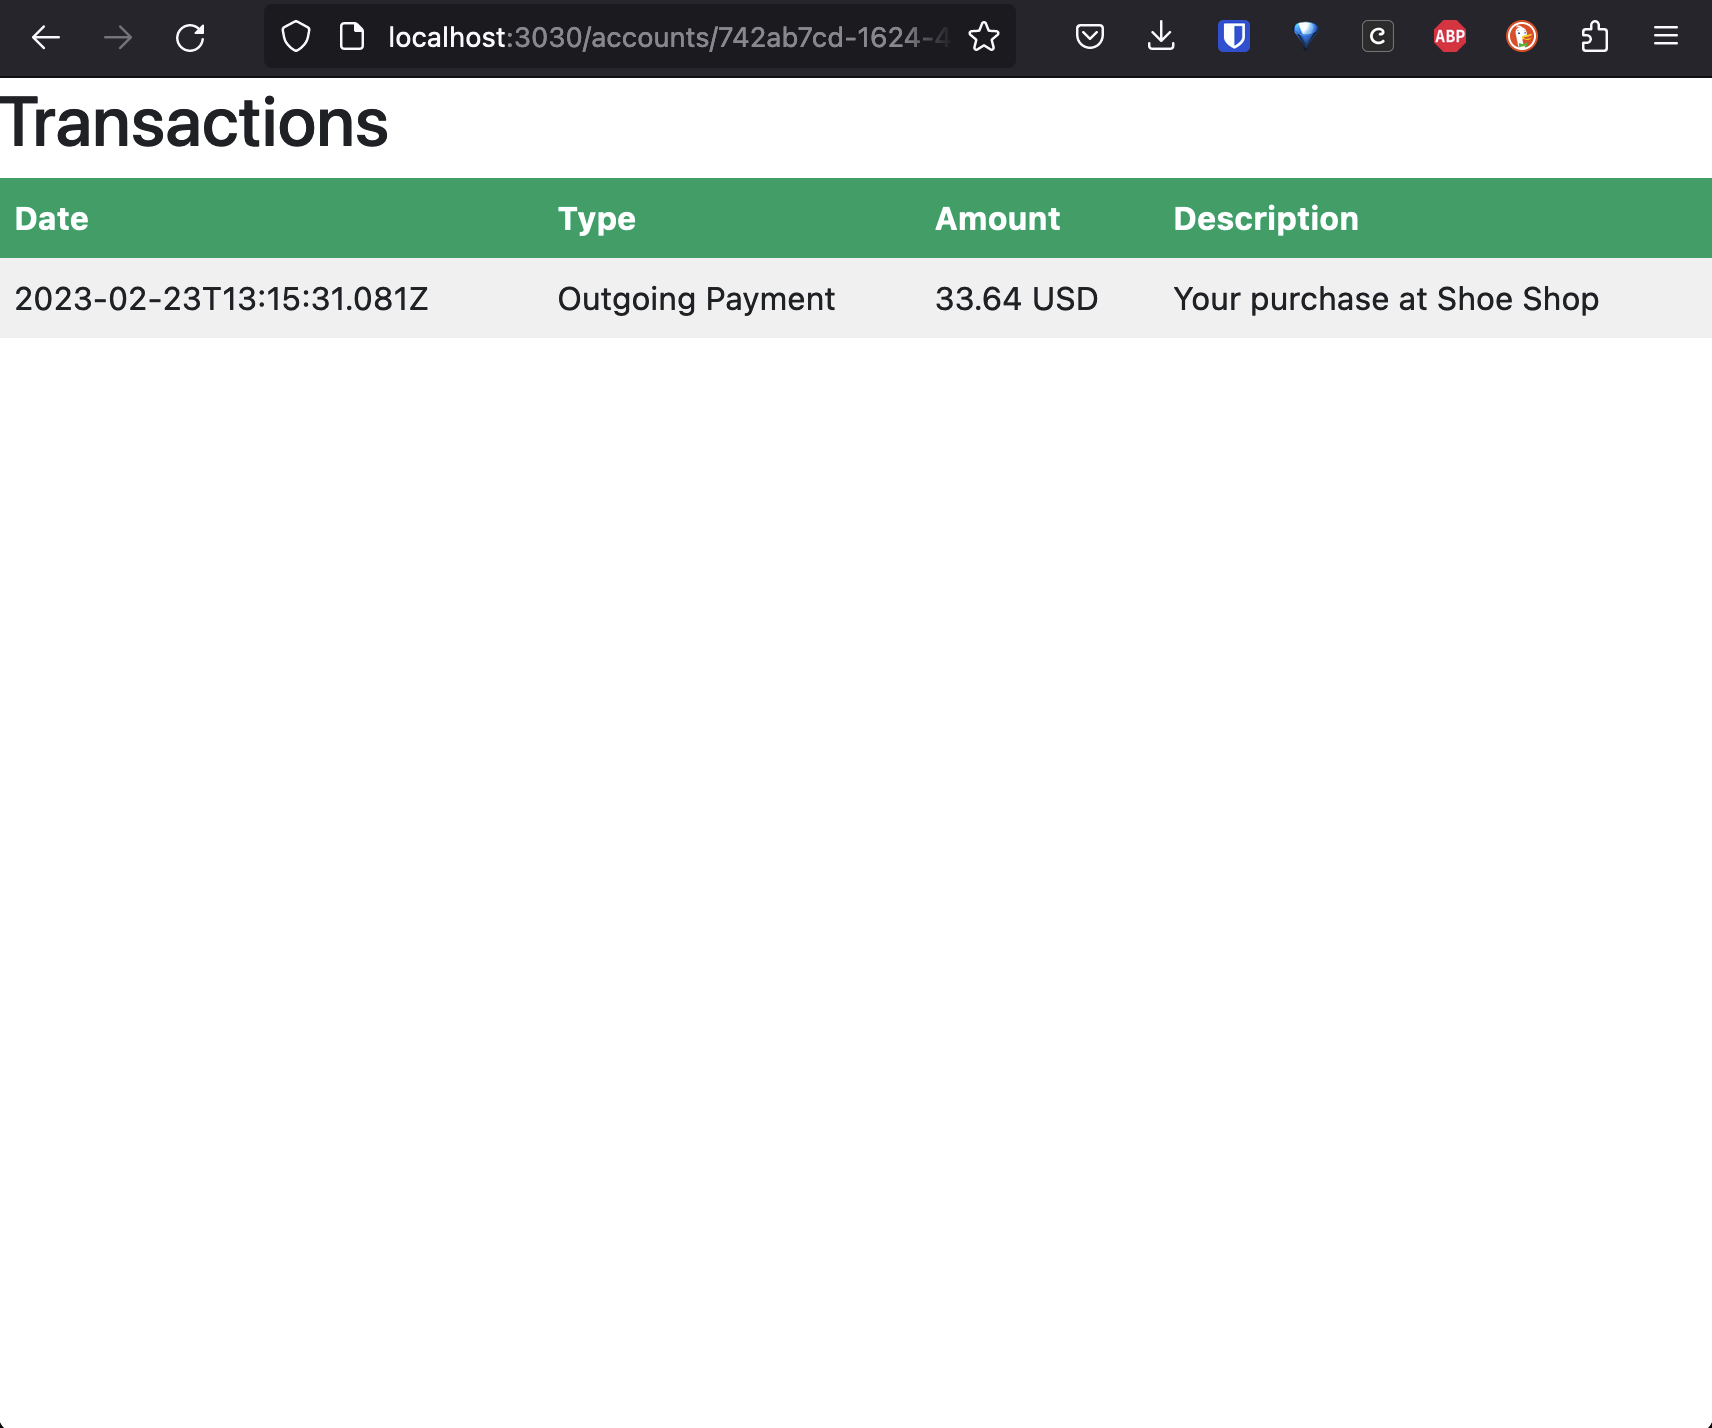
When clicking on the Account Name, a list of Transactions appears.
Running the local environment
Dependencies
- Rafiki local environment setup
- docker
- Bruno, an open source API client
Setup
The following should be run from the root of the project.
// If you have spun up the environment before, remember to first tear down and remove volumes!
// start the local environmentpnpm localenv:compose up
// tear down and remove volumespnpm localenv:compose down --volumes
If you want to use Postgres as the accounting database instead of TigerBeetle, you can use the psql variant of the localenv:compose commands:
pnpm localenv:compose:psql uppnpm localenv:compose:psql down --volumesThe local environment consists of a primary Rafiki instance and a secondary Rafiki instance, each with
its own docker compose files (Cloud Nine Wallet, Happy Life Bank).
The primary Cloud Nine Wallet docker compose file (./cloud-nine-wallet/docker-compose.yml) includes the main Rafiki services backend and auth, as well
as the required data stores tigerbeetle (if enabled), redis, and postgres, so it can be run on its own.
The secondary Happy Life Bank docker compose file (./happy-life-bank/docker-compose.yml) includes only the Rafiki services, not the data stores. It uses the
data stores created by the primary Rafiki instance so it can’t be run by itself.
The pnpm localenv:compose up command starts both the primary instance and the secondary.
Shutting down
// tear downpnpm localenv:compose down
// tear down and delete database volumespnpm localenv:compose down --volumes
Commands
| Command | Description |
|---|---|
pnpm localenv:compose config | Show all merged config (with Tigerbeetle) |
pnpm localenv:compose up | Start (with Tigerbeetle) |
pnpm localenv:compose up -d | Start (with Tigerbeetle) detached |
pnpm localenv:compose down | Down (with Tigerbeetle) |
pnpm localenv:compose down --volumes | Down and kill volumes (with Tigerbeetle) |
pnpm localenv:compose down --volumes --rmi all | Down, kill volumes (with Tigerbeetle) and images |
pnpm localenv:compose:psql config | Show all merged config (with Postgresql) |
pnpm localenv:compose build | Build all the containers (with Tigerbeetle) |
pnpm localenv:compose:psql up | Start (with Postgresql) |
pnpm localenv:compose:psql up -d | Start (with Postgresql) detached |
pnpm localenv:compose:psql down | Down (with Postgresql) |
pnpm localenv:compose:psql down --volumes | Down (with Postgresql) and kill volumes |
pnpm localenv:compose:psql build | Build all the containers (with Postgresql) |
Usage
Bruno & Open Payments APIs
The Open Payments APIs can be interacted with using the Bruno collection (resource server endpoints and auth server endpoints). It requires you to
- load the collection into Bruno by clicking “Open Collection”
- navigating to
/rafiki/bruno/collections/Rafikion your machine and clicking “Open” - Furthermore, you need to either load the Local Environment or the Remote Environment.
The Examples folder in the Bruno collection includes an Open Payments example that can be executed one by one. It
- requests the sender’s wallet address
- requests the receiver’s wallet address
- requests a grant to create an incoming payment on the receiver’s account
- creates an incoming payment on receiver’s account
- requests a grant to create (and read) a quote on the sender’s account
- creates a quote on the sender’s account
- requests a grant to create (and read) an outgoing payment on the sender’s account
Note that you have to go through an interaction flow by clicking on the redirect link in the grant request response. More information about the interaction flow can be found here.
- continues the grant request
- creates an outgoing payment on the sender’s account
- fetches the outgoing payment on the sender’s account
Admin UI
In order to manage, and view information about the Rafiki instance(s) using a UI, you can navigate to localhost:3010 (Cloud Nine Wallet) or localhost:4010 (Happy Life Bank). This is the frontend project which runs a Remix app for querying info and executing mutations against the Rafiki Admin APIs.
We have secured access to the Admin UI using Ory Kratos, a secure and fully open-source identity and user management solution. Check it out on GitHub. Since access to the UI is on an invitation-only basis the registration flow is not publicly available. As such, in order to access the Admin UI you can click the registration link provided in the logs during localenv startup or you can manually add a new user with the invite-user script. Run docker exec -it <admin-container-name> npm run invite-user -- example@mail.com and it will output recovery link to the terminal. The recovery link doubles as the invitation method. Copy and paste this link in your browser and you will automatically be logged in and directed to the account settings page. The next step is changing your password. We’re using a simple email and password authentication method.
There is a password recovery flow. On the login page if you clkick the forgot password link and enter an email for a registered user then you can open Mail Slurper to access the recovery link for your account.
We’ve also included a script to remove users: docker exec -it <admin-container-name> npm run delete-user -- example@mail.com.
Admin APIs
In addition to the using the Admin UI for interacting with the Admin APIs, you can also use the Apollo explorer (on localhost:3001/graphql and localhost:4001/graphql, respectively), and also via the Bruno collection. The Bruno collection is configured to use the default endpoints of the local environment.
SPSP
Every wallet address also serves as an SPSP endpoint. A GET request to e.g. http://localhost:3000/accounts/gfranklin with Accept header application/spsp4+json will return an SPSP response with STREAM connection details.
http GET http://localhost:3000/accounts/gfranklin Host:backend Accept:application/spsp4+json
HTTP/1.1 200 OKConnection: keep-aliveContent-Length: 220Content-Type: application/spsp4+jsonDate: Thu, 23 Feb 2023 13:07:24 GMTKeep-Alive: timeout=5
{    "destination_account": "test.rafiki.viXmy1OVHgvmQakNjX1C6kQMri92DzHeISEv-5VzTDuFhrpsrkDzsq5OO9Lfa9yed0L2RJGC9hA_IX-zztTtTZ87shCYvsQ",    "receipts_enabled": false,    "shared_secret": "Rz_vudcg13EPs8ehL2drvZFJS1LJ4Y3EltOI60-lQ78"}
Known Issues
No data in Mock Account Servicing Entity (MASE)
It is possible that upon (re)starting the local playground, you may run into an issue where there are no accounts/wallet addresses visible in the mock account servicing entities’ pages (http://localhost:3030, http://localhost:3031). This is because seeding of the intial account data only works against an empty database. To correct this, clear the volumes, and restart the container via:
pnpm localenv:compose down --volumespnpm localenv:compose up -dTigerBeetle container exits with code 137
This is a known issue when running TigerBeetle in Docker: the container exits without logs and simply shows error code 137. To fix this, increase the Docker memory limit.
If you are running the local playground in Docker on a Windows machine using WSL, you can increase the memory limit by configuring your .wslconfig file.